

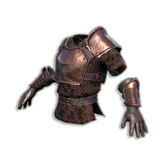
🛡️ Defensive decision
Pair the armour choice with the weapon guide, boss preparation and farming and healing loop.
For exploration, prioritise a loadout that keeps movement and recovery reliable. For a known encounter, compare the enemy’s damage pattern with the armour effect and food reserve. Test the change on a low-risk target, then return to the original setup if the trade-off increases stamina or healing pressure. A good choice is one that survives the intended route while keeping the next upgrade affordable.
Choose a defensive set by damage class and durability
Use the combat triangle as the first filter: melee, ranged and magic armour are not interchangeable labels. A matching set can provide a set bonus, while durability degrades during combat and other damage events. Therefore the practical comparison is damage class + set bonus + weakest-slot durability + repair access. A set that looks stronger but breaks before the return route is not ready for the expedition.
Armour follows the melee, ranged and magic combat triangle, and matching pieces can provide set bonuses. For a melee route, compare a Bronze Platebody or higher tier with the target’s power expectation. Most pieces also lose durability during combat and other damage events. Choose armour for the damage class you expect and plan how you will repair it.
Before an expedition, check the set class against the encounter, compare the weakest slot with the region’s power expectation, and bring the materials or station access needed for repair. If a mixed set is intentional, record what bonus is being traded away for the extra resistance or utility; otherwise, keep the pieces in one class and test the result on a low-risk target.
Choose a set with a repair budget
Start with the encounter damage class, then compare the set bonus with the actual trade-off. A matching melee, ranged or magic set may provide a useful bonus, but a mixed set can be justified when one slot supplies a needed resistance or utility. State the reason for mixing instead of presenting it as a universal best build.
Durability is part of your defence. Check the weakest piece before leaving, carry repair materials or plan a return to the relevant station, and do not spend the last repair resource on a low-risk test. During a boss attempt, decide whether damage comes from a missing resistance, poor positioning, stamina exhaustion or a broken item. Change one variable after each attempt. The build is ready when it survives the target encounter and still leaves you a recovery path.
Choose armour by the next failure you need to prevent
Compare the region power with your equipped gear level before choosing a set. Decide whether you need protection from contact damage, an elemental weakness, better stamina recovery, more carrying flexibility or a safer retreat. Keep spare food and water, and avoid encumbrance: it removes running and jumping and reduces movement to 60%.
Use the journal’s enemy weakness/resistance information to decide whether armour is enough or whether the real problem is the weapon/damage type. Test the set on the same ordinary encounter twice, record damage taken and recovery time, and only then commit rare materials to a larger upgrade. The game has armour slots, but there is no universal “best set” across every region.
| If your problem is… | Start with… | Confirm before upgrading |
|---|---|---|
| Contact damage in melee range | A melee armour set at or above the region power | Weakest slot durability, repair materials and whether the set bonus is active |
| Ranged positioning or long routes | A ranged set plus enough ammunition and retreat stamina | Carry weight, ammunition supply and whether movement is safer than extra defence |
| Spell or rune pressure | A magic set plus the runes and food the route consumes | Spellbook unlock, rune cost and the ability to recover before the next cast |
| Frequent encumbrance or failed retreats | The lightest viable set and a smaller expedition load | Weight bar, running/jumping availability and a nearby storage/repair point |
This is a choice table, not a fixed tier list. The live region power, enemy journal entry and current repair recipe decide whether a set is ready for the route.
The armour is ready for this route when
Your armour setup is ready when its class, set bonus, durability and repair plan fit the named encounter. Mix armour only for a specific benefit, and after a failed run check resistance, positioning, stamina and equipment condition separately.